Announcement

Collapse
No announcement yet.

Add a utility sink in attached garage.

Collapse

Forum Top GA Ad Widget

Collapse
X
 
  • Filter
  • Time
  • Show
Clear All
new posts

  • Add a utility sink in attached garage.

    I am interested in professional advice for installing a utility sink in my attached garage that would satisfy the most stringent codes for the moderate climate of Southern California. My concerns deal primarily with the waste drainage and venting, the hot/cold supply lines are fairly straight forward but I will listen to and heed all advice. Please view the “Plumbing” images of the work area on my personal website at <...//littlegus.com/Remodel/photos.htm>. If the hyperlink does not work, simply copy and paste the case sensitive URL into the address bar of your web browser after the <http:> prefix.

    The unexposed region behind the drywall above the cleanout is exactly what you would expect from building contractors circa 1972. Professional advice depicting parts and placement, along with an explanation, would allow me to get this job done right the first time.

  • #2
    Yea you can tie in on that line just make sure that both remain vented.

    You can draw the picture I'll correct it.
    I stayed at a Holiday Inn Express last night.
    Now I can Plumb!

    For great information on the history of sanitary sewers including the use of Redwood Pipe
    Visit http://www.sewerhistory.org/
    Did you know some Redwood Pipe is still in service today.

    Comment


    • #3
      Thanks for your reply, Redwood.

      I will annotate several images so you can let me know which one is most correct. It might take me two or three days to get these images generated and posted but that gives me an opportunity to post this non-related question to hopefully solve another problem while creating enough posts to upload my images directly to this forum (five posts are required for beginners).

      Other Problem: Sewer gas odor is present from bathroom sink after gutting and rebuilding bathroom with new appliances. The only physical difference between before and after is that the sink's trap sits higher above the floor (so wife can cram more stuff into the cabinet) placing the weir of the trap about 1" below the bottom wall of the horizontal pipe protruding from the wall. After disassembling, cleaning and replacing the trap the odor is now only present while the the sink is draining. Could this problem be the result of positioning the sink's trap too high thereby creating an inadequate water seal? What should the distance be between the trap weir and the bottom wall of the horizontal drain pipe protruding from the wall?

      Comment


      • #4
        A picture of the smelly trap suspect would be helpful as well.
        Can you post a picture?
        I stayed at a Holiday Inn Express last night.
        Now I can Plumb!

        For great information on the history of sanitary sewers including the use of Redwood Pipe
        Visit http://www.sewerhistory.org/
        Did you know some Redwood Pipe is still in service today.

        Comment


        • #5
          Redwood,

          I posted the pictures of the smelly trap on my personal site at <...//littlegus.com/Remodel/photos.htm>, directly below the original photos of the garage. I won't be able to place images directly to this forum until after I reach the magical number of ten posts. Let me know if you are unable to view the images.

          I am currently working on annotated drawings for the original utility sink project.

          Thanks for contributing to this forum, I'm beginning to get the hang of it now.

          Comment


          • #6
            The depth of that trap has not been altered and is okay by what I can see in the pictures. It should not be causing an odor problem. Frequently a build up of scum in the drain above the water line of the trap or, in the sink overflow can cause odor problems. You say it is new but is it old enough that it could be cruded up and stinking?
            I stayed at a Holiday Inn Express last night.
            Now I can Plumb!

            For great information on the history of sanitary sewers including the use of Redwood Pipe
            Visit http://www.sewerhistory.org/
            Did you know some Redwood Pipe is still in service today.

            Comment


            • #7
              Originally posted by Papa-Gus View Post
              I won't be able to place images directly to this forum until after I reach the magical number of ten posts. Let me know if you are unable to view the images.
              I tried to disable this so you'll be able to upload, could you please see if you can now upload attachments?
              Try

              Comment


              • #8
                The bathroom sewer odor started within several months after the bathroom was finished and placed into service. This led me to believe the problem may be related to the placement of the trap since the likelihood of crud buildup developing in such a short time would be unlikely. Other sinks in the house don't have this problem and they're all used with the same regularity and yes, I've replaced all the sinks in the past. However, when I did disassemble the trap and cleaned the lines, I managed to clear out more crud than anticipated. I admit, the odor is now only slightly detectable and present only while water is draining; but present none the less.

                This bathroom project did sit idle for two years prior installing and connecting new sink and toilet. During this time, the waste lines were sealed off from the living space with plastic and tape. Not sure if this has any impact on the problem at hand but thought it was worth mentioning.

                Should I take another crack at cleaning out the trap and lines? What method of cleaning do you recommend?

                I'm attempting an attachment upload using an image of the bathroom when it was gutted. Not really useful for troubleshooting the odor problem but it will let me see if Troy's modification to the site settings is successful.

                Comment


                • #9
                  Troy, thanks for giving me a pass to upload images. This will certainly make life easier for those lending a hand.

                  Comment


                  • #10
                    The stuff in the wall looks fine by what I can see.

                    I'd take a try at cleaning out the sink overflow.
                    That's probably where the rest of the stank is coming from.
                    I'd say your odor problem is somewhere between the pop up stopper and the water in the trap.
                    I stayed at a Holiday Inn Express last night.
                    Now I can Plumb!

                    For great information on the history of sanitary sewers including the use of Redwood Pipe
                    Visit http://www.sewerhistory.org/
                    Did you know some Redwood Pipe is still in service today.

                    Comment


                    • #11
                      Back to the utility sink in the garage. I created two possibilities for the dwv scenario; please provide your thoughts and suggestions. The area is tight and I am considering moving the washing machine standpipe to the next bay on the left since the washer and dryer are also getting moved to the left.

                      Puzzle A: With reference to scenario #2, once the vertical vent pipe gets cut will I be able to easily move it up and down through the roof flashing? Otherwise I'm not sure how to get the fittings in place where I tie into the vent.

                      Puzzle B: With regard to moving the standpipe into the next bay on the left; the hole cut into the stud for the drain pipe will exceed the maximum surface area allowed by building code. Is this generally ignored since there is no way to avoid placing the pipe through the stud? The original contractor didn't seem too worried about cutting a 2.5 inch hole in the 2X4 stud to the right.

                      Pictures:

                      Comment


                      • #12
                        Your 2nd drawing was very close to being right!
                        The venting wasn't quite right notice in my drawing attached below that an air path is provided to each trap that does not have water from another fixture running by it. Make sure you set the sink drain at the right height for the utility sink...

                        Ahh one other question pops...
                        You are not in a place where freezing would be a problem are you?

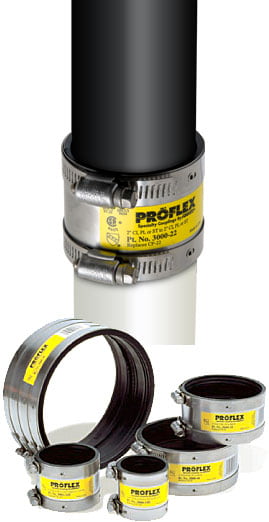
                        A.) You probably will have some movement but I would plan on having at least on of the connections being a banded coupling like a Fernco Proflex the rubber is thin and can be rolled back over itself allowing the pipe to slide into place.


                        B.) Yes you can drill the stud for the pipe to go through
                        Last edited by Redwood; 02-07-2010, 07:18 PM.
                        I stayed at a Holiday Inn Express last night.
                        Now I can Plumb!

                        For great information on the history of sanitary sewers including the use of Redwood Pipe
                        Visit http://www.sewerhistory.org/
                        Did you know some Redwood Pipe is still in service today.

                        Comment


                        • #13
                          No freezing issues in this part of Southern California, happy to say. Thanks for the tip on the Fernco Proflex fittings.

                          Originally posted by Redwood View Post
                          Make sure you set the sink drain at the right height for the utility sink...
                          Are you just reminding me to make sure the drain pipe is not higher than the sink’s tail piece or are you alluding to some min/max height level required by code?


                          Schematically, I don't see the difference between my second drawing and the one you provided. Physically, however, there is a difference and your written explanation makes sense. With all the research I've done, I've seen drawings showing both configurations; hence the reason I'm visiting this forum. Unfortunately, the bay containing the cleanout and vertical vent pipe doesn't allow enough space for connecting the utility sink drain pipe. Even if I used a sani-tee and came straight out of the wall, the drain pipe would then be at too high an elevation for the utility sink drain.


                          Taking into account the space allowed and physical attributes of the stud wall, would the drawing below provide what you prescribe for proper drainage and venting?

                          Comment


                          • #14
                            Gus, I was just saying to be careful on the height of the drain in relation to the tailpiece, all to often I see the classic oops and a utility sink up on blocks...

                            Your last drawing is good.

                            In your second drawing which was almost right you had the sink draining into the washing machine standpipe's vent...
                            Last edited by Redwood; 02-09-2010, 02:11 AM.
                            I stayed at a Holiday Inn Express last night.
                            Now I can Plumb!

                            For great information on the history of sanitary sewers including the use of Redwood Pipe
                            Visit http://www.sewerhistory.org/
                            Did you know some Redwood Pipe is still in service today.

                            Comment


                            • #15
                              Redwood, thanks for the valuable information and lessons in plumbing one-oh-one.

                              No worry about getting the measurements wrong and putting the sink up on blocks. Careful planning has gone into this job because something much bigger than a utility sink is getting installed inside the house on the other side of wall; naturally, this leads to more inquiries.

                              With your years of plumbing service, do you have much experience with installing pipes through fire rated walls into the living space? I ask this because directly on the other side of the wall a salt water aquarium is being installed and I want to locate all noise making components inside the garage (pumps, chiller, exhaust fan, etc…). I've researched through-wall penetrations for 2-hour fire rated assemblies and selected Hilti FS-One intumescent foam for sealing the openings around water and electrical lines.

                              Do you have any input, suggestions or referrals to other tradesmen in this forum regarding the use of sleeves around plumbing and electrical bundles for fire rated wall penetrations?

                              Comment

                              Working...
                              X