
 Tweet
Tweet
Hi Folks,
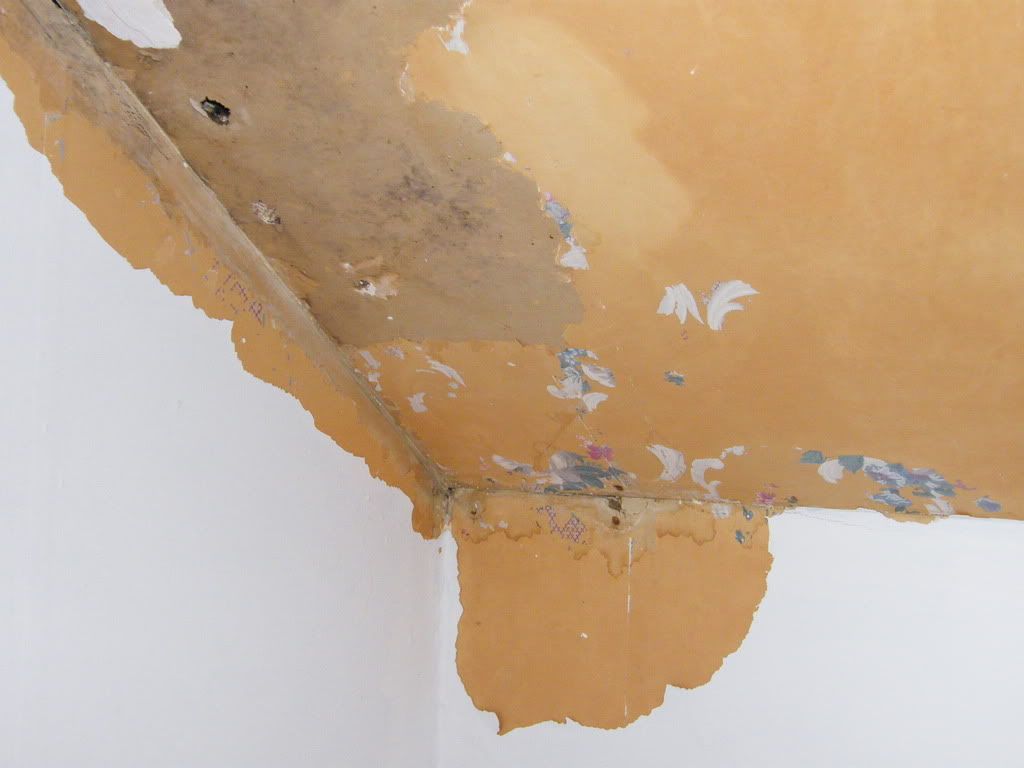
We just bought our first house, a 1947 cape-cod-style with 1.5 stories. While the ground floor walls are plaster, the upper floor is finished with something else. Throughout the two dormer rooms, hallway, and closet, every wall, ceiling, and angled dormer ceiling/wall is covered with paper with overlapping seams about an inch thick every two feet, and tape seams over the joints. This has all been painted over many times, most recently with high gloss paint.
We began scraping the paint off, which is remarkably easy. Beneath it is fairly smooth brown wallpaper backing, and beneath that is a very rough, thick, dark brown paper that is bonded to the wall boards. The seams everywhere are caused by overlapping of the smooth paper, and are actually printed with directions that say "join here" and apprise us that the product is washable, union made, and won't fade in the sun! When we pull these seams off, we get to the fuzzy brown paper beneath. There is no way that any of this can be sanded smooth.
Some of the wall panels show some damage and will probably have to be replaced with something, but we don't really want to drywall over the entire upper floor of our house-- besides the expense and difficulty, it would be hard to deal with the built-in drawers and trim-- so we are thinking we'll have to seal these papery walls and skim-coat everything. This is new water to tread, for us.
I'll attach a photo, and a link to a photobucket with a bunch of photos of these walls. If anyone can give us advice on how to handle this-- what kind of products to use, where to start, where to look for technical directions-- we will really appreciate it.
Thanks for your help, K & T
Victoria_2393/Second Floor Nightmare - Photobucket - Video and Image Hosting


Comment